This is a guide to help order translations from within the Adobe Experience Manager.
Steps
Creating a translation Project
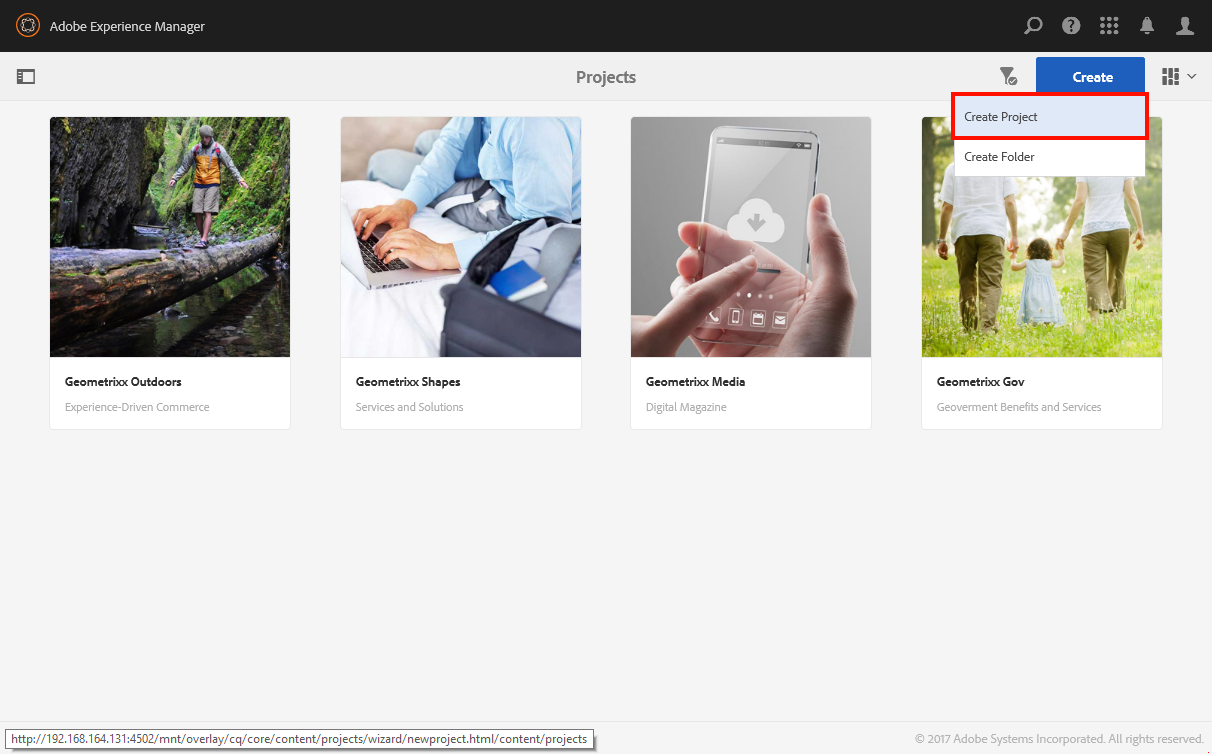
1. Click on Create Project in the projects overview
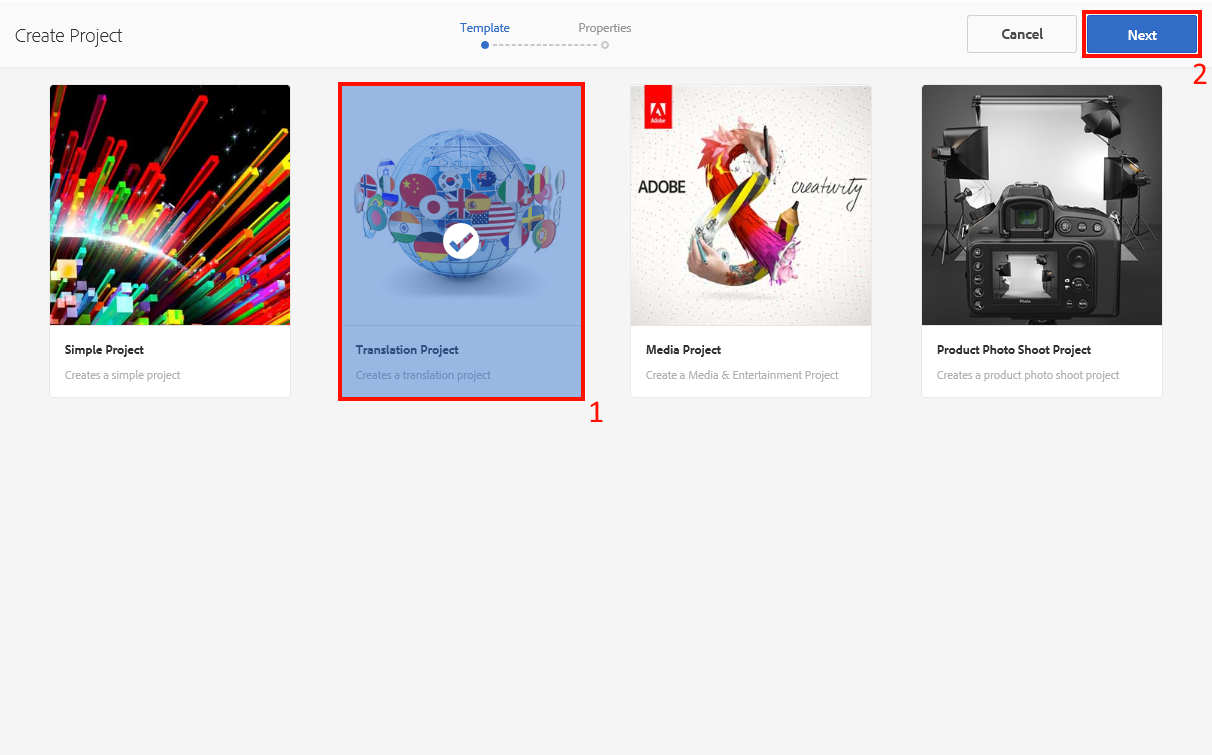
2. Select Translation Project and click on Next
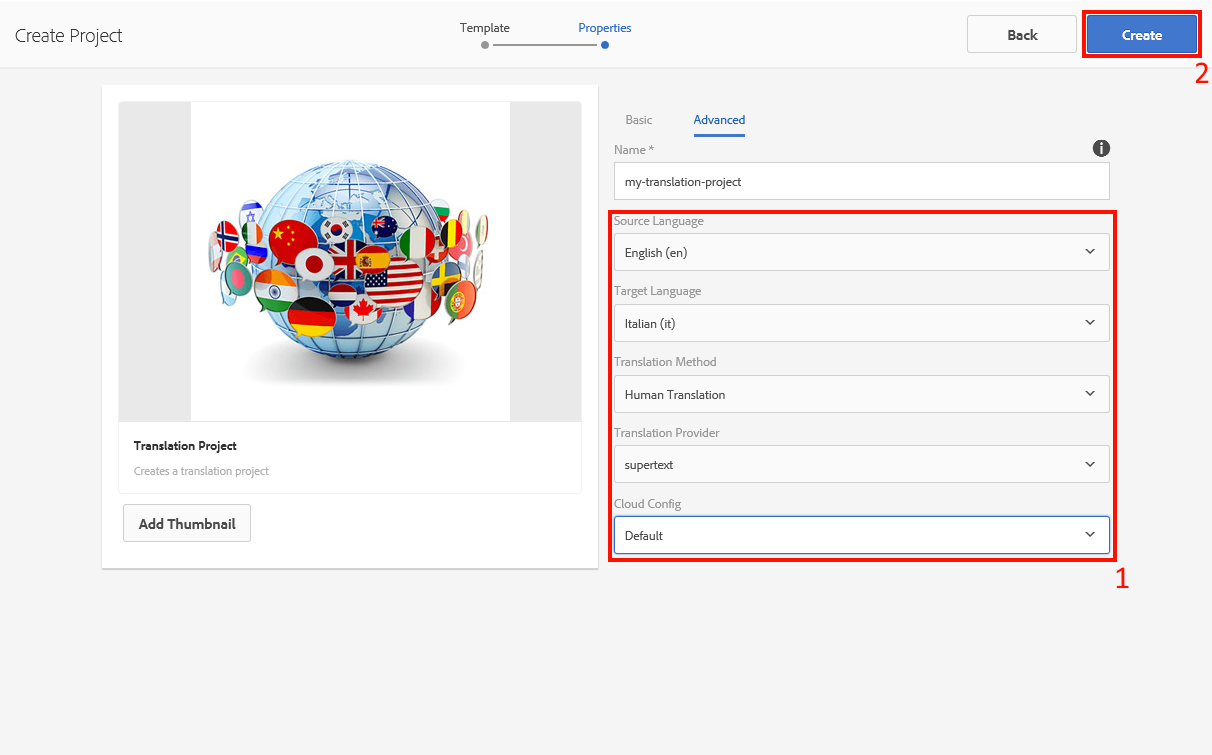
3. Fill in the mandatory fields of the Basic form
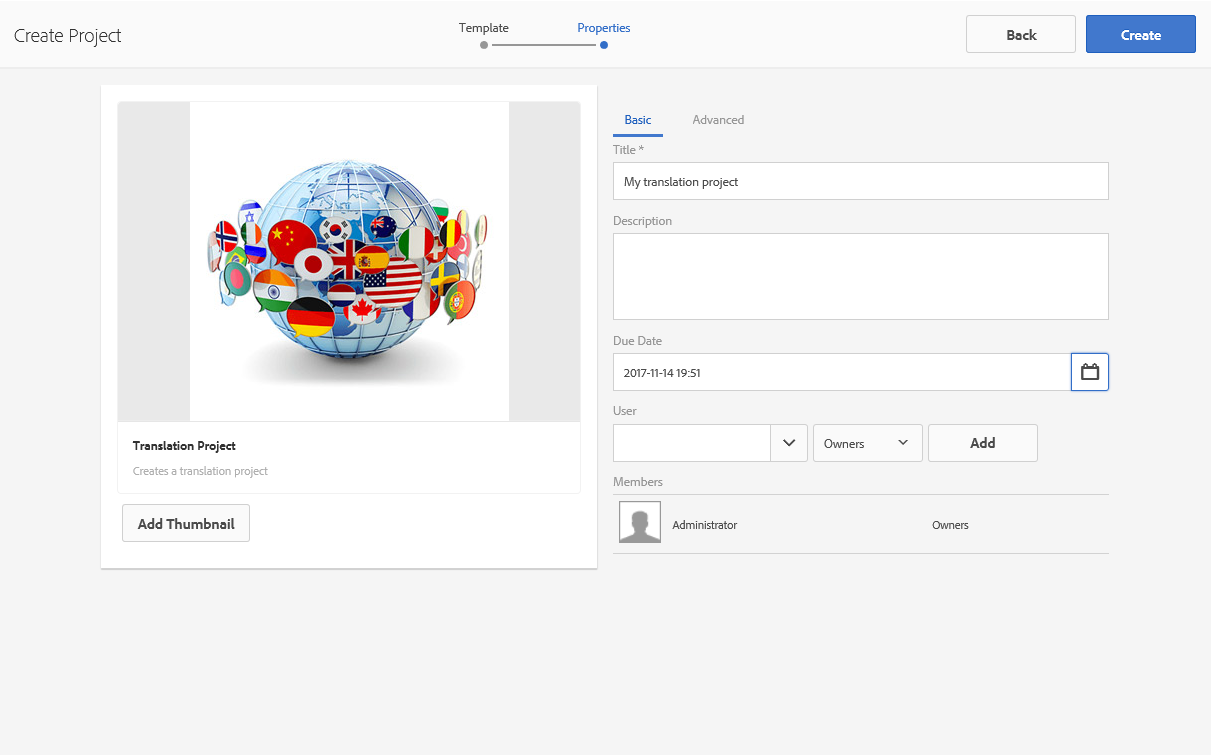
4. Under Advanced, select the source and target language, Human Translation as translation method, Supertext as translation provider and the appropriate cloud config. Click on Create.
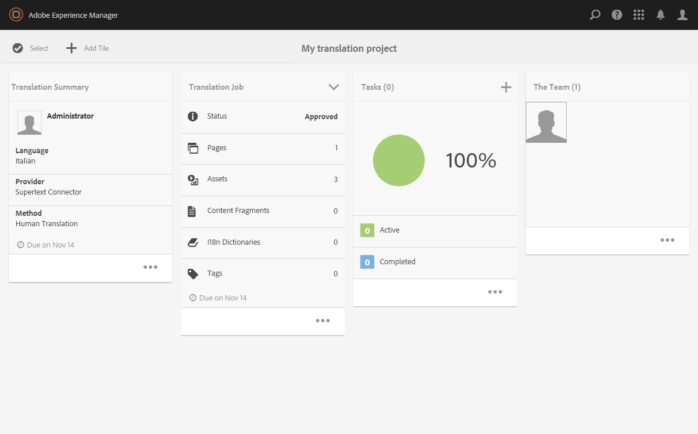
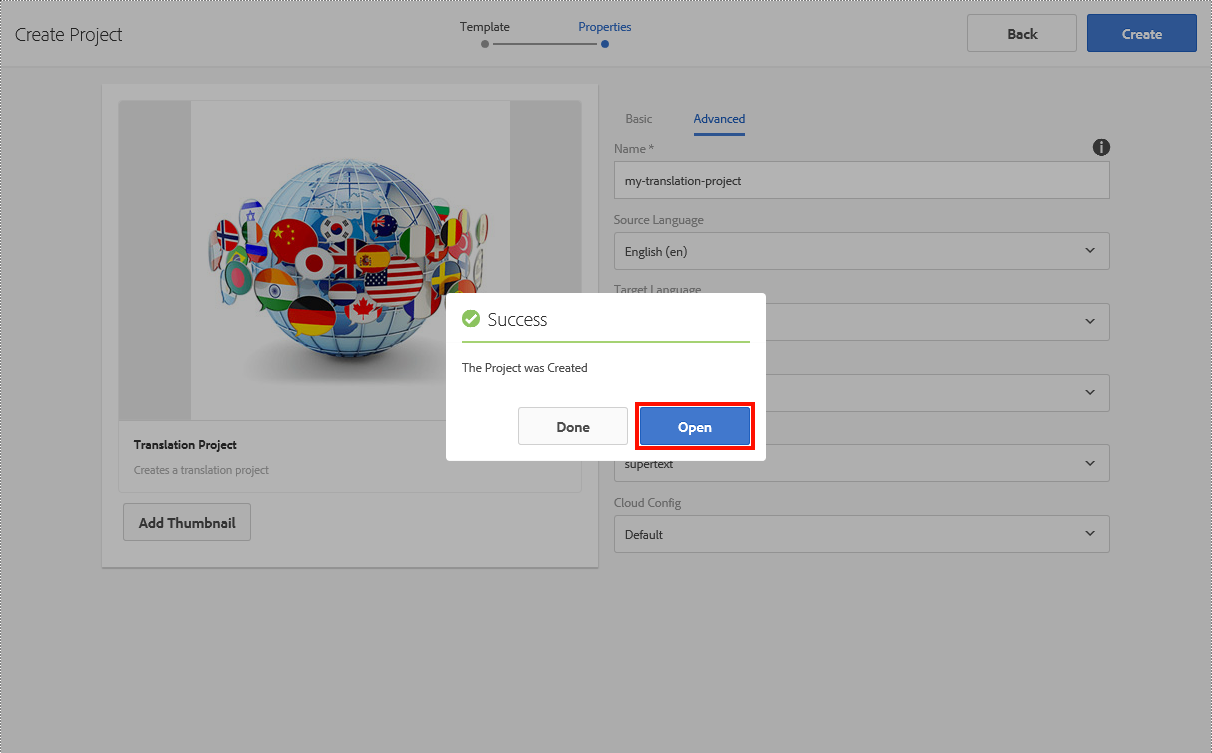
5. Open the project once successfully created.
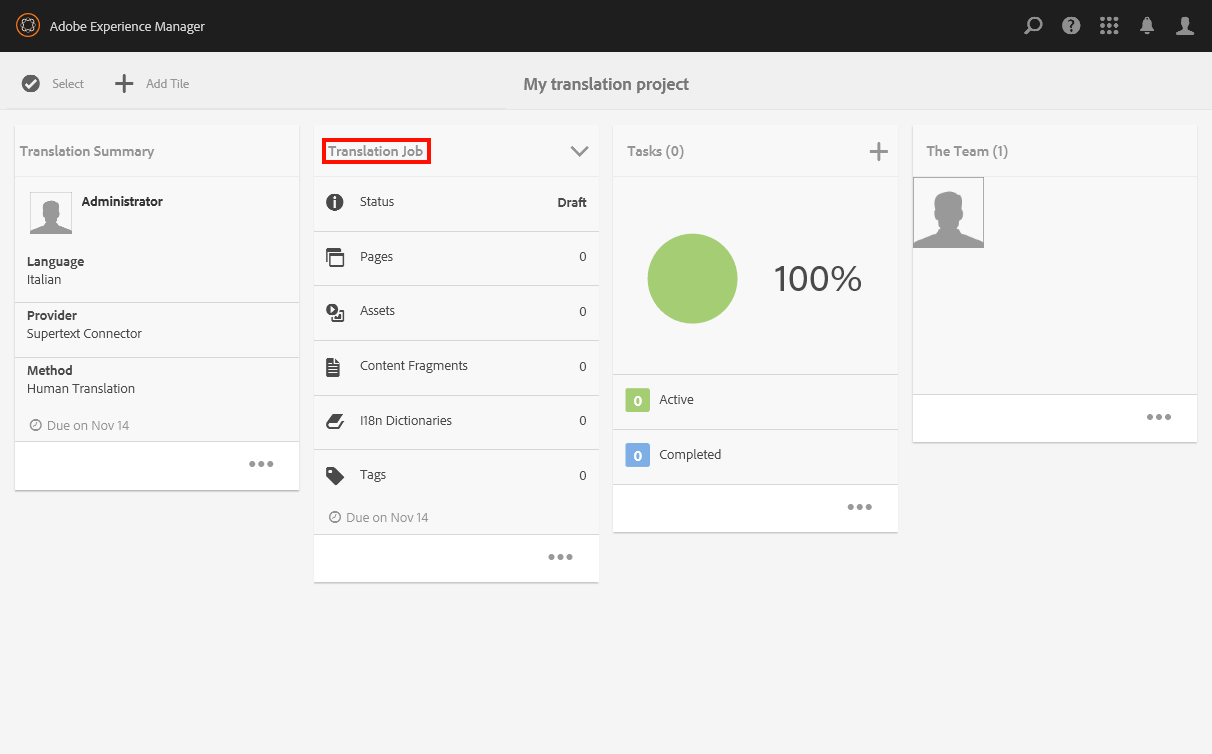
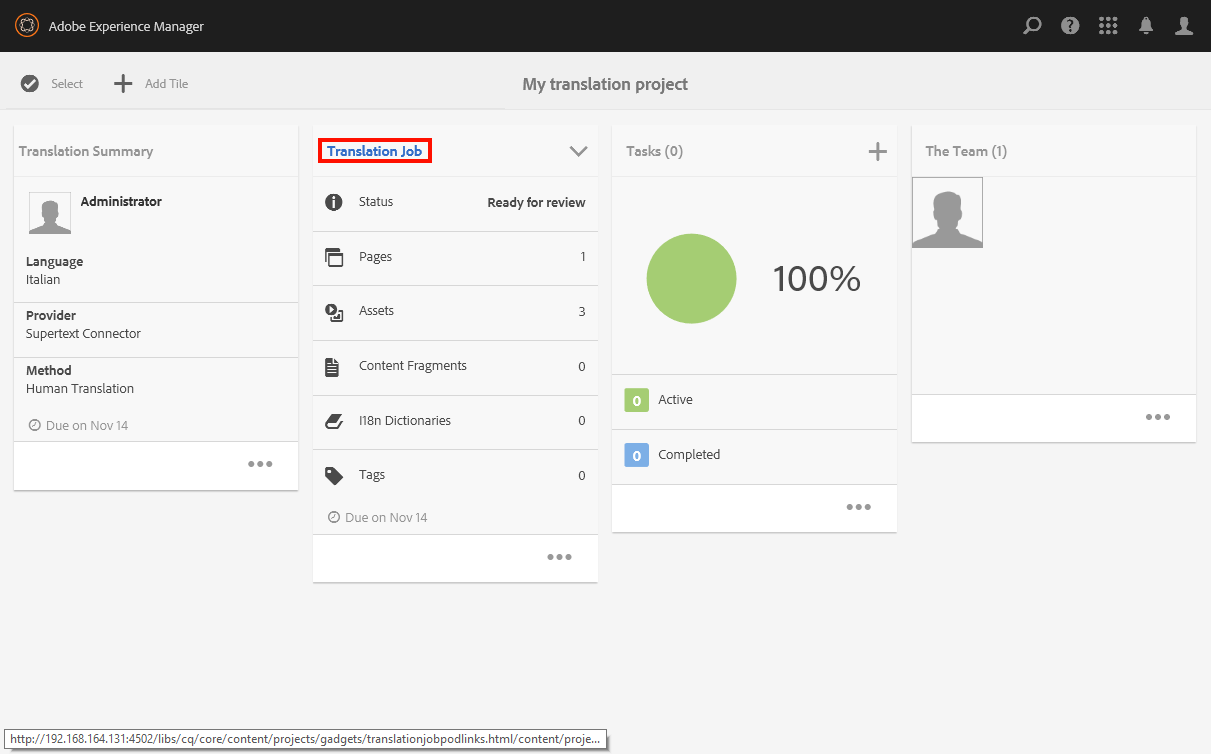
6. Click on Translation Job
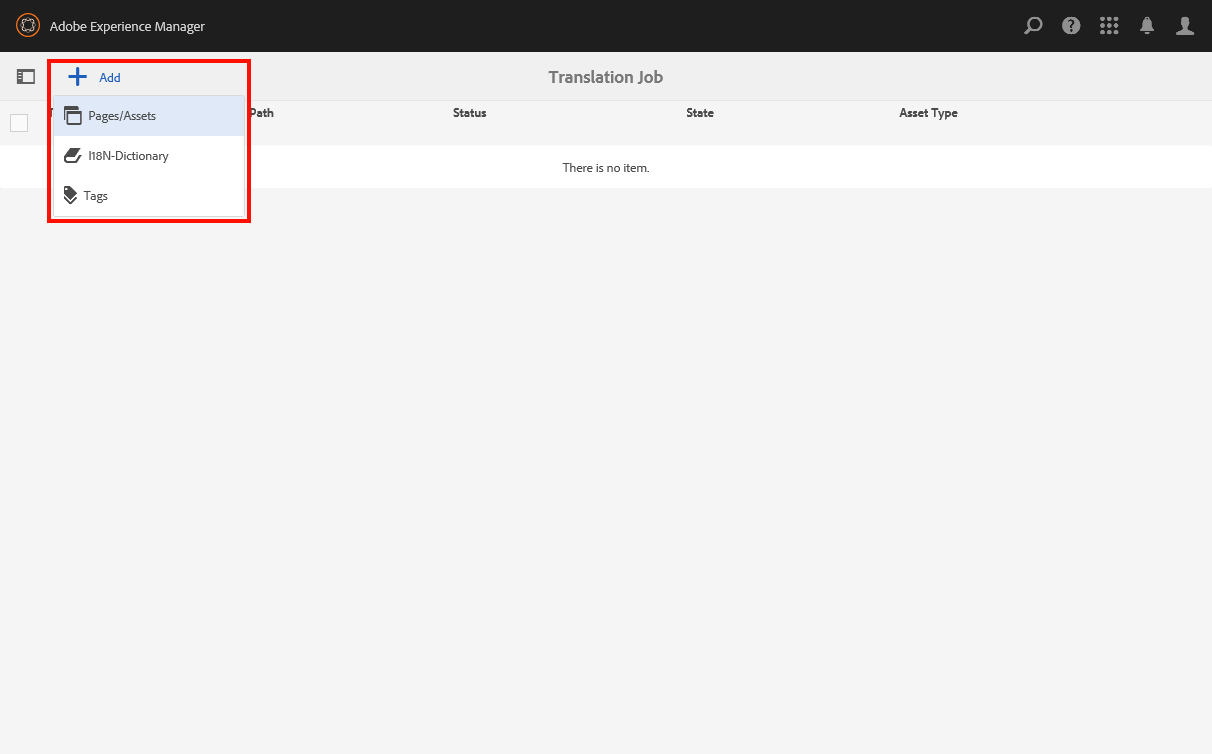
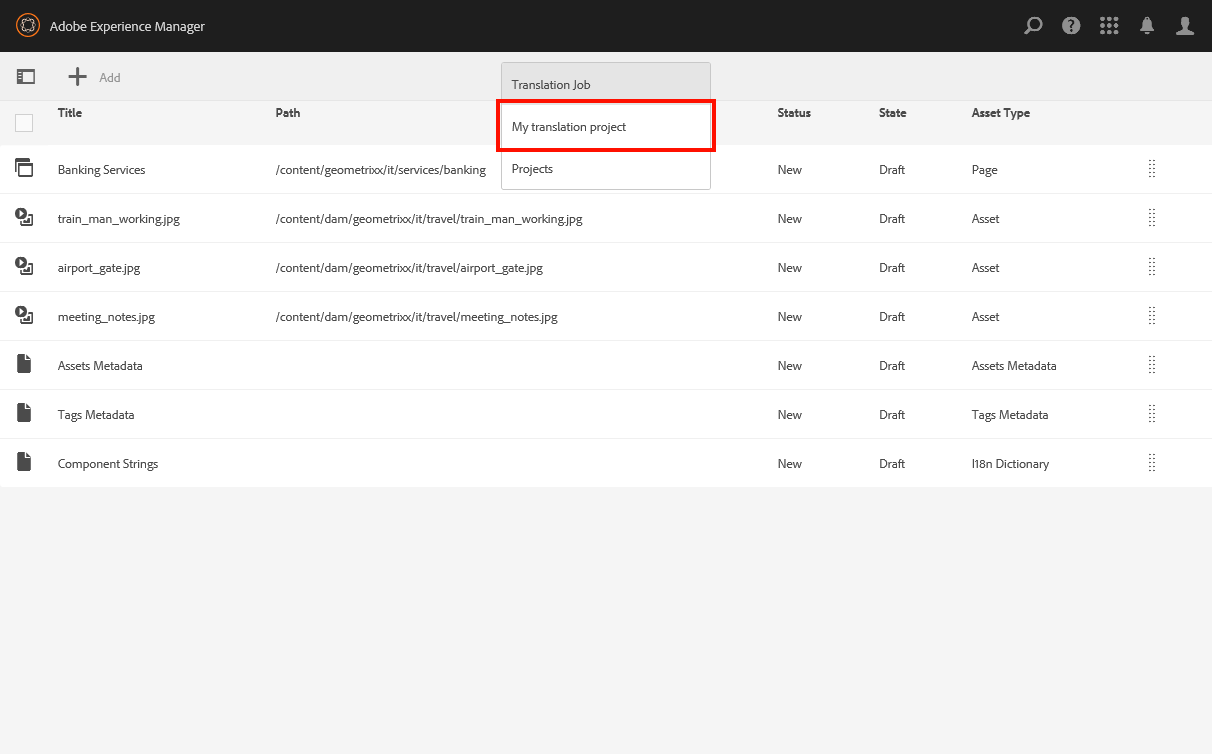
7. Select the content that needs to be translated

8. Go back to the project overview by click on Translation job and selecting the project name
Requesting the scope
1. Once the project is created you can get the scope by clicking on Request Scope

2. Reload the page if the Status doesn’t switch to Scope Completed automatically
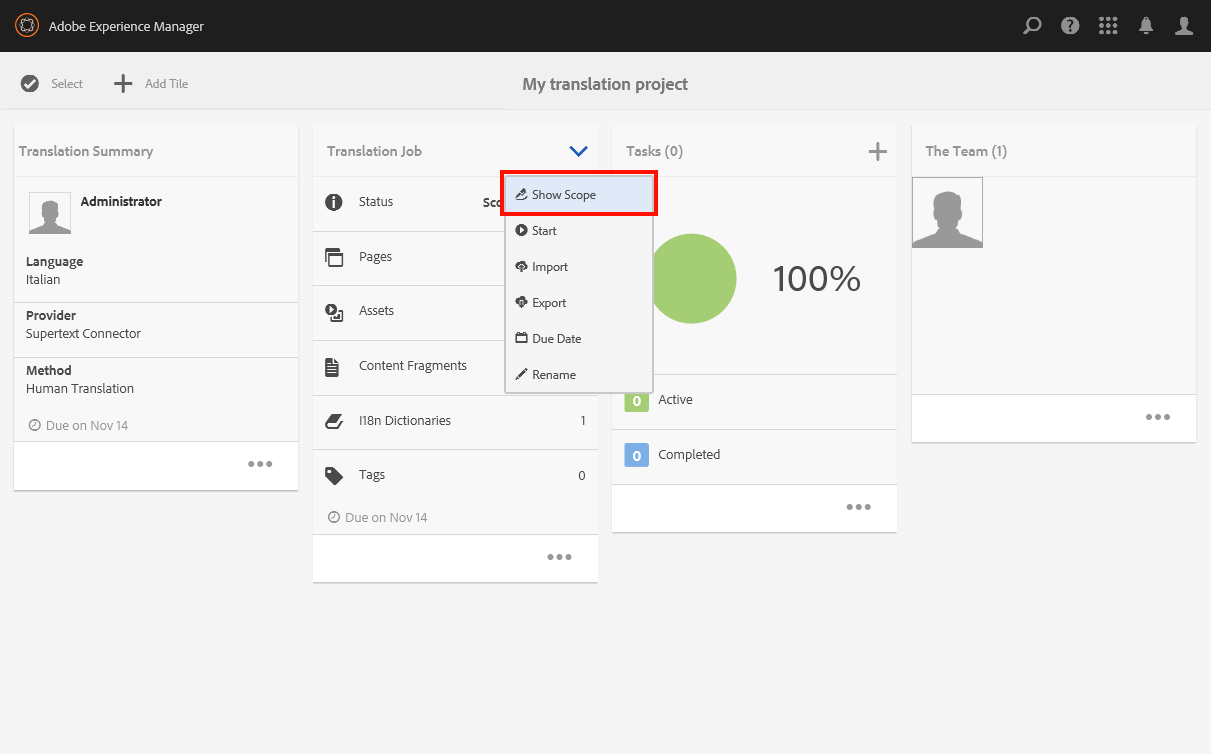
3. Click on Show Scope to see the scope
Starting the translation job
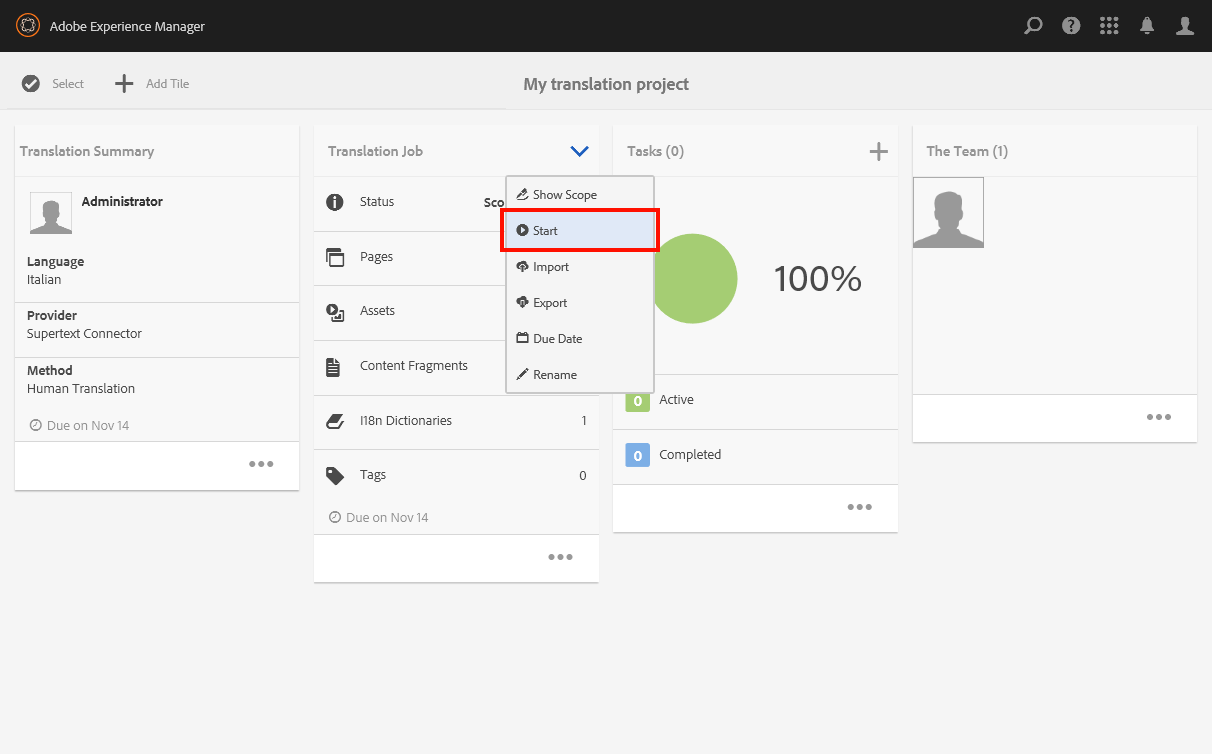
1. Once the project is created you can start the job by clicking on Start
2. Reload the page if the Status doesn’t switch to Translation in progress automatically

Reviewing the translation
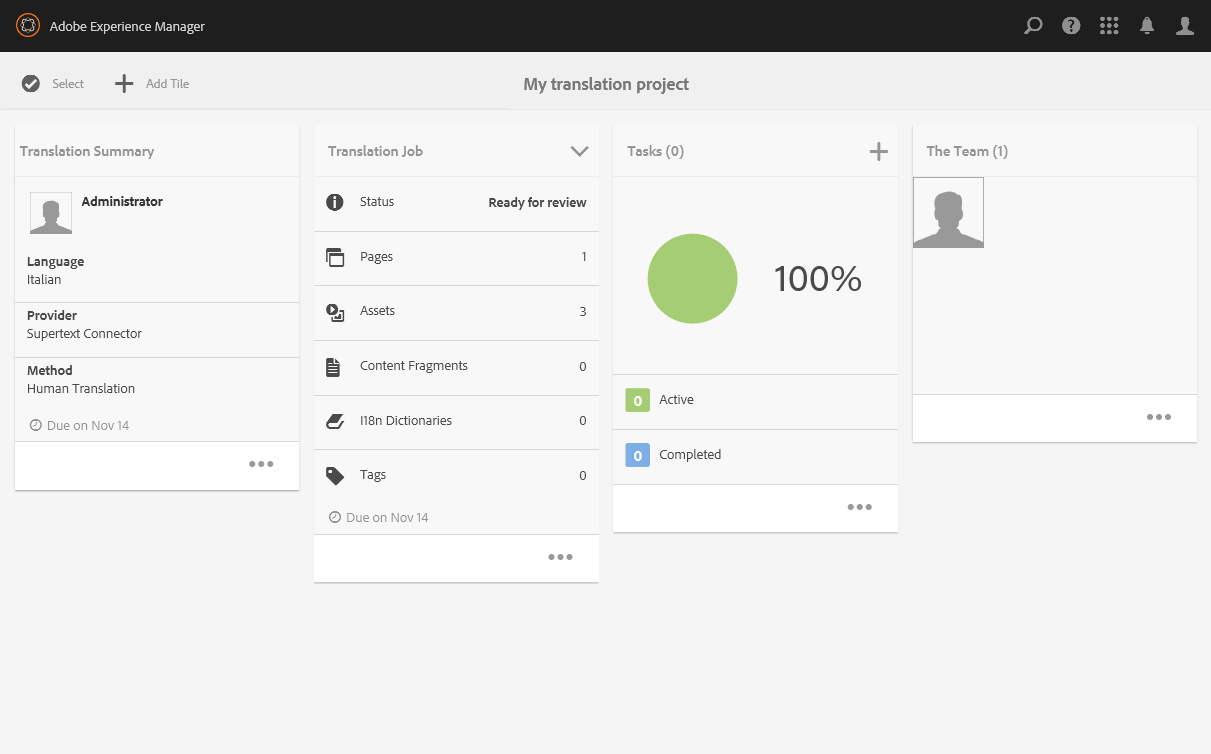
1. The Supertext user who order the translation will be notified by e-mail when the job is done. The Status of the translation job will then be Ready for review.
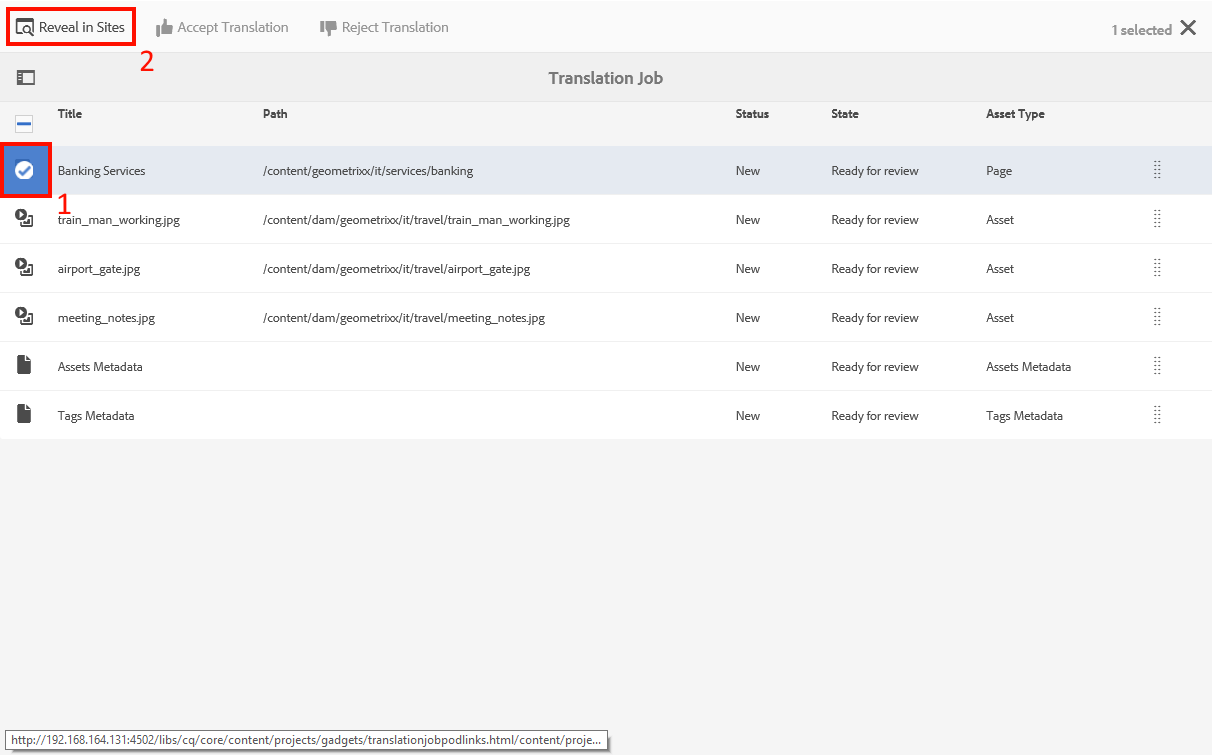
1. Open the translation job
2. Select the page you wan to review and click on Reveal in Sites
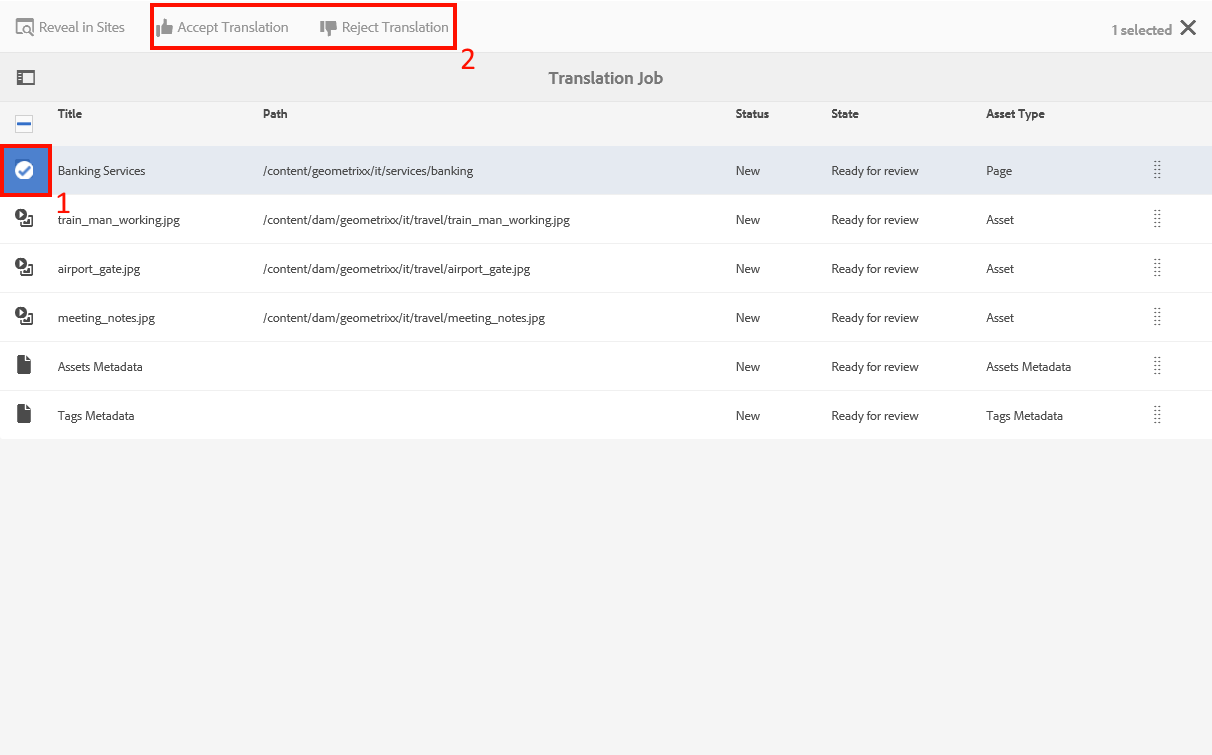
3. To accept or reject the translation select the item and click on Accept Translation / Reject Translation
AEM connector installation guide
Ein Kommentar zu “How to use the Supertext translation connector for AEM 6.2”
[…] AEM connector usage guide […]